

Transform Your Space with Contact Paper: The Ultimate Guide to Peel and Stick Solutions
Are you looking for an easy and cost-effective way to refresh your home decor? Contact paper is your answer! This versatile material is perfect for a variety of applications, from kitchen countertops to furniture makeovers. In this comprehensive guide, we will discuss everything you need to know about it, including its benefits, uses, and tips for application.
What is Contact Paper?
Contact paper is a self-adhesive vinyl product that can be used to cover surfaces. It typically comes in rolls and features a sticky backing, allowing it to adhere to a variety of surfaces without the need for additional glue. With a range of colors and patterns, contact paper can easily enhance your space.
Benefits of Using Peel and Stick Contact Paper
1. Easy to Apply
One of the most appealing features of contact paper is its ease of use. Whether you’re a DIY novice or a seasoned pro, you can achieve stunning results without complicated installation.
2. Budget-Friendly
Renovating your home can come with a hefty price tag. Contact paper provides an economical way to give your furniture and surfaces a fresh look without breaking the bank.
3. Waterproof and Durable
Made from high-quality PVC vinyl, contact paper is resistant to moisture, making it ideal for kitchen and bathroom applications. It won’t peel or bubble when exposed to water, ensuring that your surfaces remain beautiful over time.
4. Removable and Reusable
When you want a change, you can simply peel off the contact paper without damaging the surface underneath. This feature makes it a fantastic option for renters or anyone who likes to switch up their decor.
How to Use Contact Paper: A Step-by-Step Guide
Step 1: Gather Your Supplies
Before you begin, make sure you have the following materials:
- Contact paper (in your choice of design)
- Measuring tape
- Scissors or a utility knife
- Squeegee or credit card
- Cleaning supplies (for surface prep)
Step 2: Measure and Cut
Carefully measure the area you want to cover and cut the contact paper to size. Utilize the trimming gridlines on the backing paper for precise measurements.
Step 3: Clean the Surface
Ensure that the surface is clean and dry. Remove any dust, grease, or old adhesive that may prevent the contact paper from adhering properly.
Step 4: Peel and Stick
Peel the backing off the contact paper and stick it to the desired surface, starting from one edge.
Step 5: Smooth Out Bubbles
Use a squeegee or credit card to smooth out any air bubbles as you go. Start from the center and work outwards to ensure a flat application.
Step 6: Trim Excess Edges
Once you’ve applied the paper, trim any excess at the edges for a clean finish.
Creative Ways to Use Contact Paper
Transform Kitchen Counters
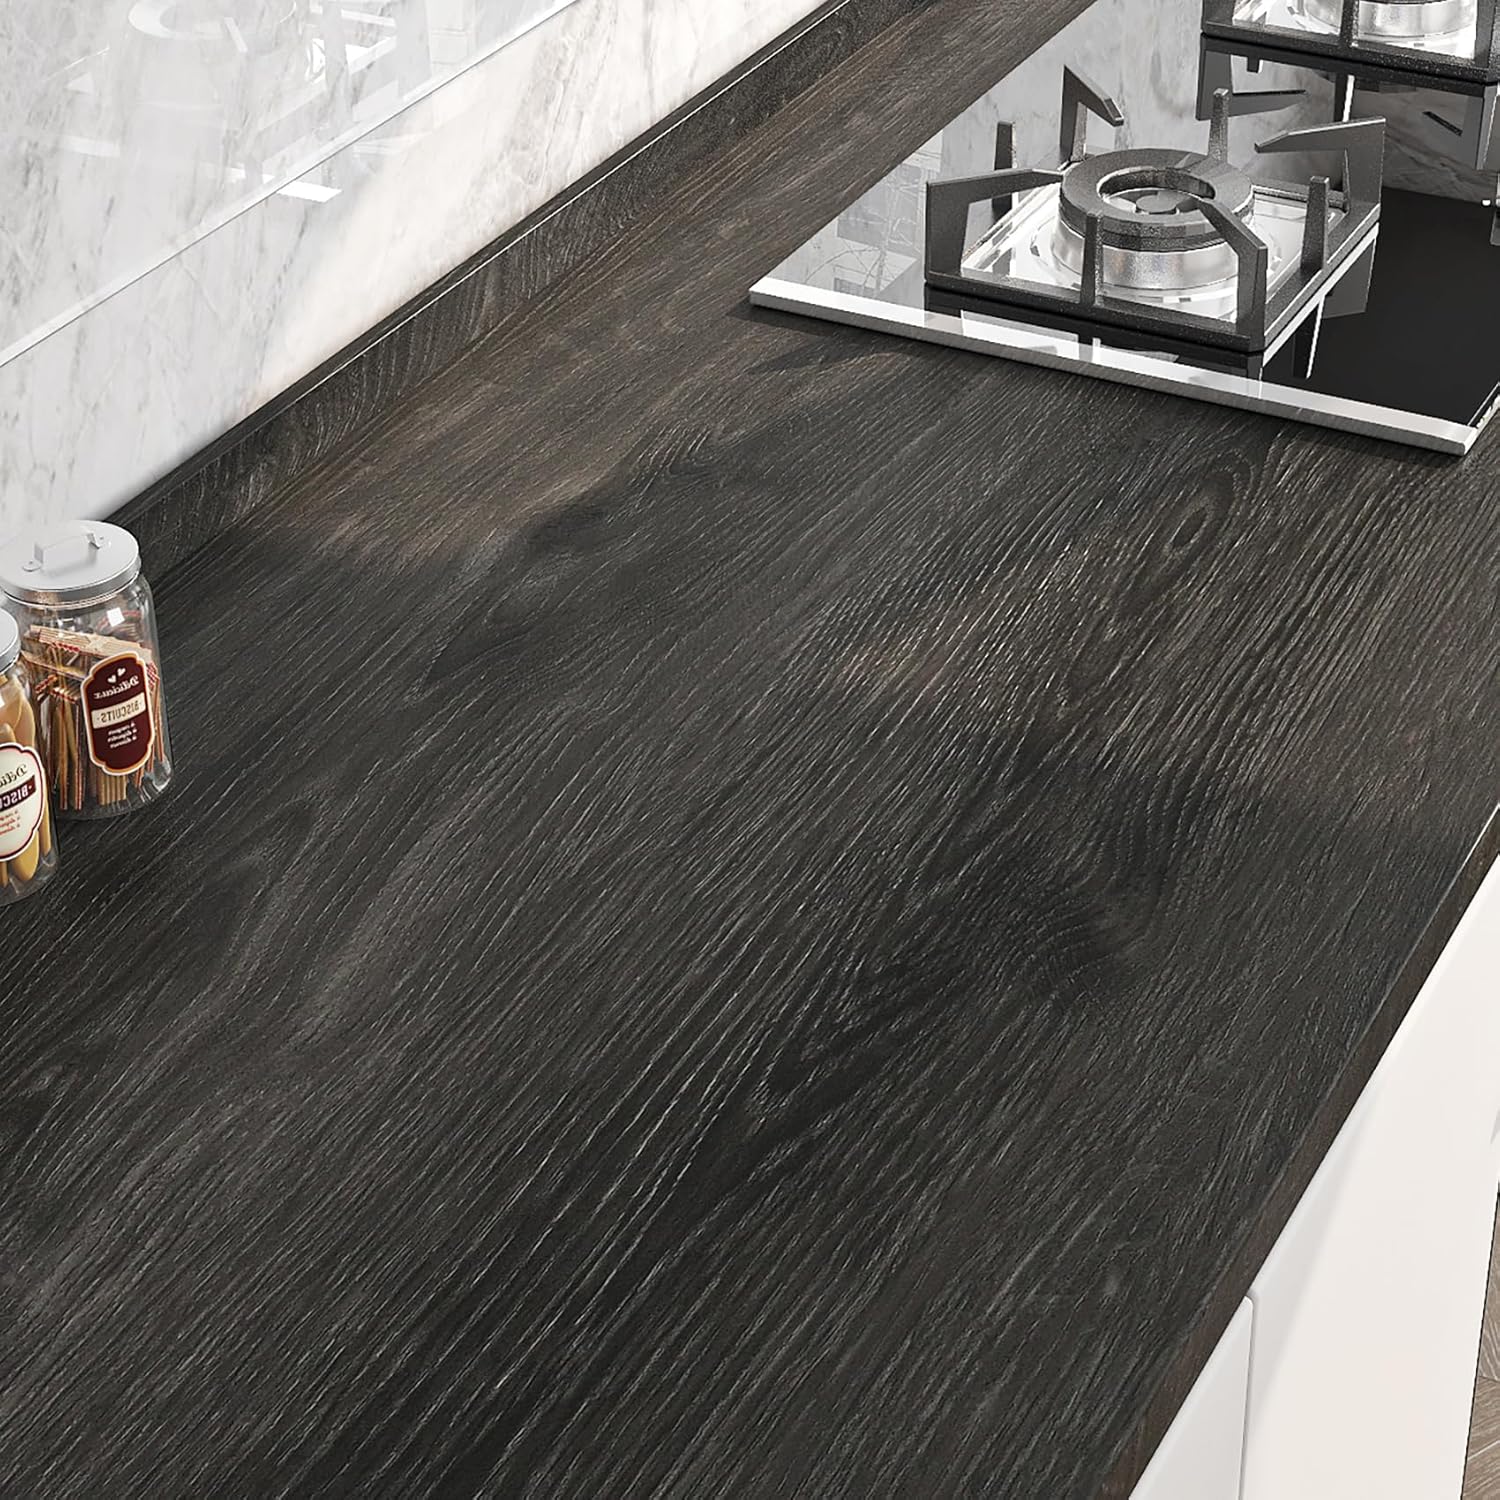
Give your kitchen a modern look by applying contact paper over outdated countertops. The espresso wood design adds warmth and elegance.
Enhance Furniture
Dress up furniture like desks and tables with contact paper. It can revitalize old surfaces, turning them into focal points.
Revamp Cabinets
Use dark wood contact paper on cabinets for a sleek appearance. It’s an excellent option for rental properties since it can be removed easily.
Decorate Walls and Doors
Transform plain doors or accent walls by applying wallpaper-like contact paper. The easy peel-and-stick application allows for a fresh look.
Pros and Cons of Using Contact Paper
Pros:
- Inexpensive: Affordable alternative to renovations.
- Versatile: Numerous designs and purposes.
- Waterproof: Safe for kitchen and bathroom applications.
- Quick and Easy: Simple application with no mess.
Cons:
- Permanent Adhesion Risks: If not applied correctly, it can become difficult to remove.
- Durability Limitations: While intended for durability, it may not withstand heavy wear in high-traffic areas.
Is Contact Paper the Right Choice for You?
If you’re considering a temporary or low-cost solution to updating your space, contact paper presents an excellent option. It’s perfect for small projects or larger renovations, providing flexibility and style.
What Surfaces Can You Use Contact Paper On?
Contact paper can adhere to several surfaces, including:
- Wood
- Metal
- Plastic
- Glass
- Smooth walls
How Do You Remove Contact Paper?
To remove, gently pull one corner of the contact paper and peel it away slowly. If it resists, apply heat from a hairdryer to soften the adhesive.
Can You Use Contact Paper Outdoors?
While contact paper is primarily designed for indoor use, some varieties may withstand occasional outdoor exposure. Always check the manufacturer’s specifications before application.
Conclusion
Contact paper is a versatile and affordable solution for anyone looking to update their home decor without the need for a complete renovation. Whether you’re revamping your kitchen, enhancing furniture, or even decorating a room, peel and stick contact paper offers countless possibilities to unleash your creativity. With its ease of use and variety of designs, it’s an ideal option for anyone wanting to improve their living space on a budget.
FAQs
1. Can you apply contact paper over existing vinyl?
Yes, contact paper can be applied over existing vinyl surfaces as long as they are clean and smooth.
2. How long does contact paper last?
With proper application and care, contact paper can last several years without fading or peeling.
3. Is contact paper safe for food surfaces?
It’s advisable to avoid using contact paper on surfaces that directly contact food, as the adhesive may not be food-safe.
4. How do you clean surfaces covered with contact paper?
Use a damp cloth with mild soap to clean surfaces. Avoid abrasive cleaners that may scratch the surface.
5. Can contact paper be used in humid areas like bathrooms?
Yes, as long as it is applied correctly, contact paper can withstand humidity and moisture in bathrooms.


